Are you looking for a fun Christmas paper craft to use as Christmas decoration or on Christmas gift bags? Find out how to make this easy red truck with Christmas tree craft this holiday season! Scroll for the full instructions!
This red truck with Christmas tree paper craft tutorial may contain affiliate links, which means if you click on the link and purchase the item, I will receive an affiliate commission at no extra cost to you. All opinions remain my own.
You know that vintage red truck hauling a Christmas tree that’s everywhere this time of year? The one on pillows, mugs, and farmhouse signs? Your kids can make their own version with just paper, glue, and scissors.
This craft takes about 20 minutes start to finish, and it’s perfect for kids of all ages. Younger kids can glue pre-cut pieces while older kids can handle the whole thing themselves.
The best part? I’m giving you free printable templates so you don’t have to freehand anything.
Why the Red Truck and Christmas Tree?
That iconic red pickup with a tree in the back has serious nostalgia vibes. It started with Chevrolet’s classic half-ton pickup design and became the symbol of heading out to get your own tree.
Now it’s everywhere during the holidays, and honestly? It never gets old.
Little Blue Truck Fans, Listen Up
If your toddler is obsessed with Little Blue Truck Christmas, just swap red paper for blue. Boom, you’ve got a Little Blue Truck craft that ties perfectly into story time.

Christmas Red Truck with Christmas Tree Craft Supplies
What You’ll Need
Most of this you probably already have in your craft stash:
- Colored construction paper (red, green, blue, black, grey, white)
- Craft glue or glue stick
- Scissors
- Pencil
- Free printable templates (Template 1 and Template 2)
How to Make Your Red Truck Christmas Craft
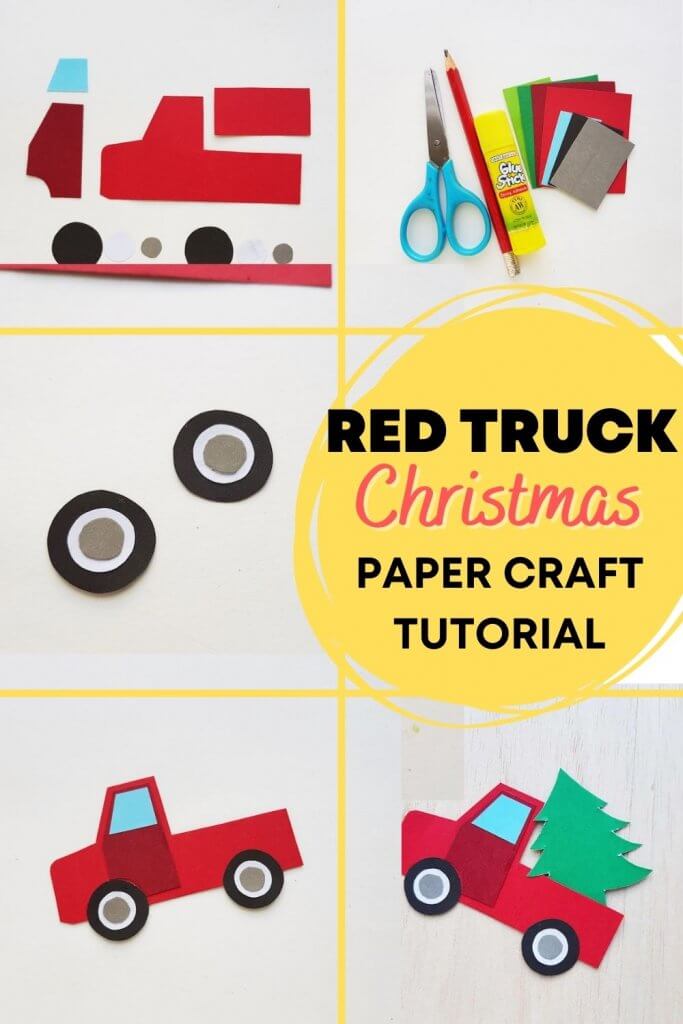
Step 1: Cut Out Your Pieces
Print the templates and trace them onto your colored paper. Here’s what colors we used:

Red for the truck body Black, grey, and white for the wheels Blue for the windshield Green for the Christmas tree
Cut everything out. If you’re crafting with toddlers or preschoolers, do all the cutting ahead of time. Trust me on this.
Step 2: Make the Wheels
Grab your three wheel circles (small, medium, and large). Glue the smallest circle on the medium one, then glue that onto the largest circle.

You’re basically making a layered wheel. Repeat for the second wheel.
Step 3: Add the Windshield to the Door
Take your blue windshield piece and glue it near the top of the door cutout. Leave a border around it so you can see the door frame.
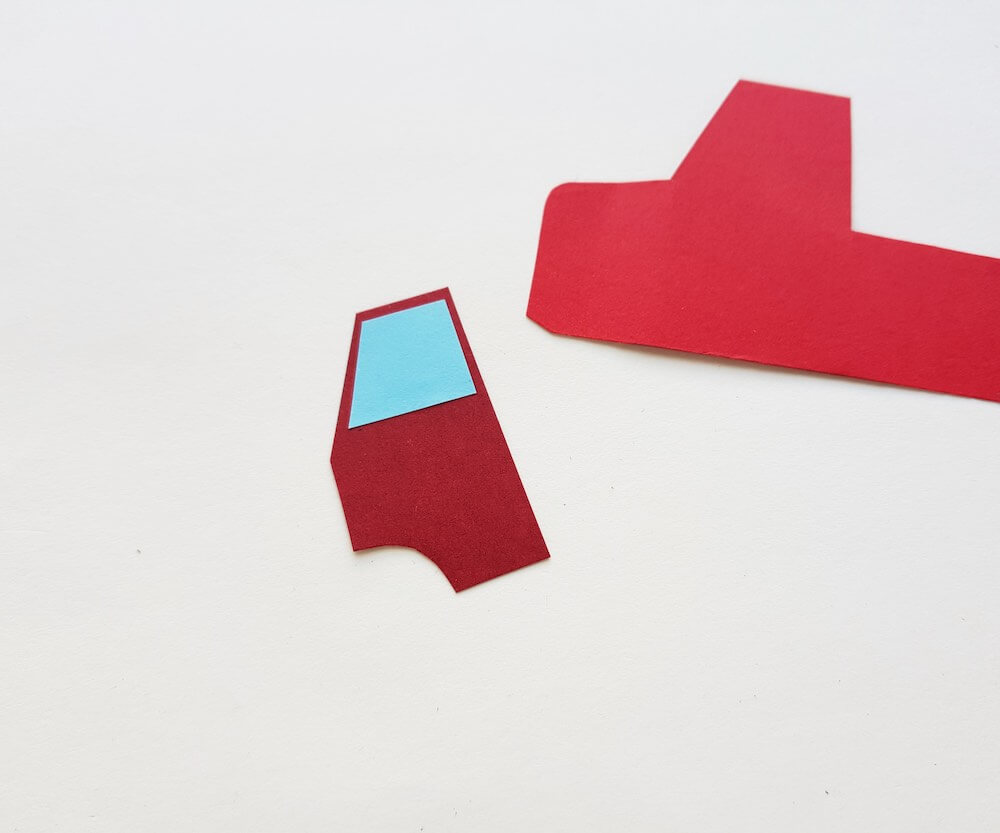
This is where little kids might need help with placement, but honestly, even if it’s crooked it’ll still look cute.
Step 4: Attach the Door to the Truck Body
Line up the door with the truck body and glue it down. Try to match the outer edges so you get an even border showing the truck’s frame.

Step 5: Create the Truck Bed (This Is the Clever Part)
Flip your truck over to the back side.
Take the rectangle piece and put glue ONLY on the two short ends and the bottom. Do not glue the top edge.

You’re making a pocket for the Christmas tree to slide into.
Step 6: Glue Down the Pocket
Stick that rectangle onto the back of the truck, keeping the unglued edge at the top. That open end is where you’ll slide the tree in later.

Step 7: Flip It Back Over
Turn your truck back to the front. You’re almost done.

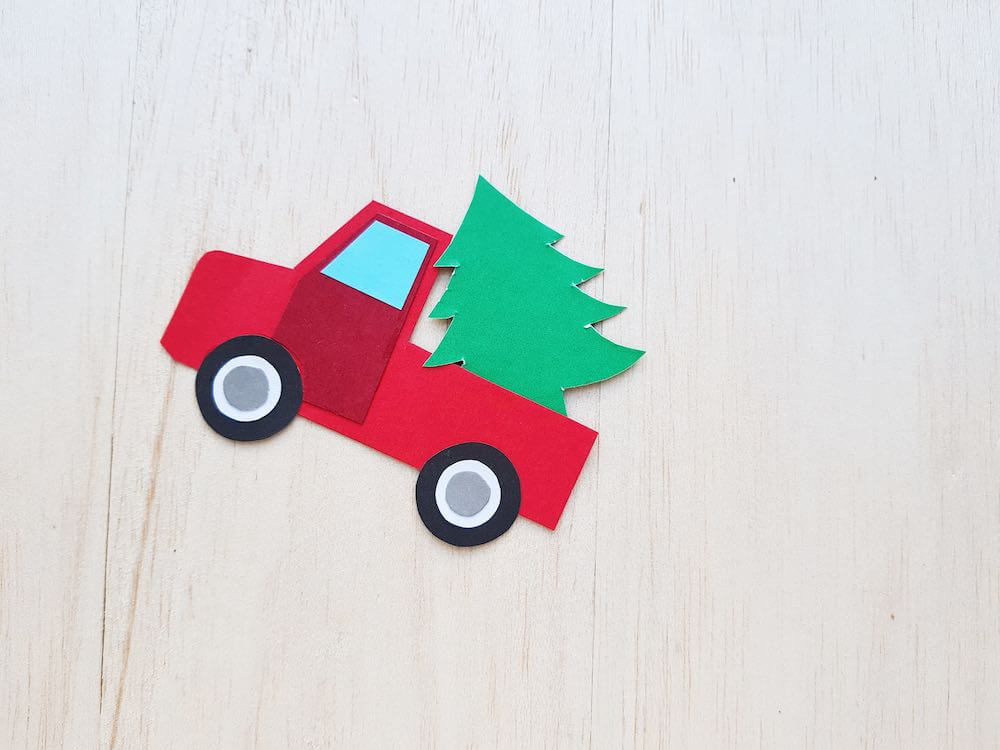
Step 8: Add Your Christmas Tree
Cut out the tree from green paper and slide it into the pocket on the back of the truck.
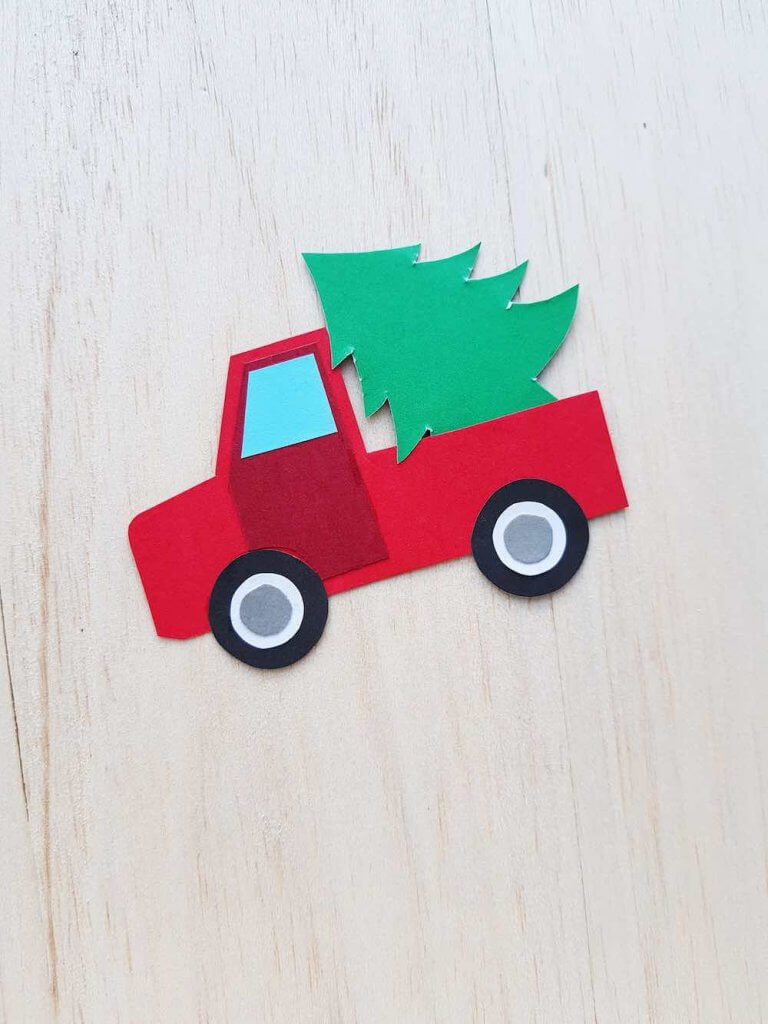
You can glue it in place if you want it permanent, or leave it loose so kids can “load” and “unload” the tree. My kids loved being able to take the tree in and out.
What to Do with Your Finished Truck
Hang it on the wall, stick it on the fridge, use it as a gift tag on presents, or let your kids play with it.
Some teachers use these as bulletin board decorations or send them home as take-home crafts.
You could also punch a hole in the top and turn it into an ornament. Just add some ribbon and hang it on your tree.
More Christmas Crafts Your Kids Will Love
If you’re on a crafting kick, check out these other easy Christmas projects:
- 41 Christmas Paper Crafts for a ton more ideas
- Mickey Mouse Snowflake Template for Disney-loving families
- How to Write a Letter to Santa with free printable envelopes and stamps
This craft is simple enough for a weeknight and fun enough that your kids will actually want to make it.
Loving this Red Truck with Christmas Tree Craft and want to try more Christmas paper crafts? Find out how to make Paper Poinsettias or a Paper Poinsettia Wreath, get my Mickey Mouse snowflake template, and download my Santa Envelopes and Stamps!
Red Truck with Christmas Tree Craft Tutorial

This red Christmas truck craft is super easy to make with kids! You can pre-cut the pieces for younger kids to assemble or have older kids do the entire project on their own. This is one of our favorite paper crafts for Christmas.
Materials
- Colored craft paper
- Craft glue
- Pencil
- Christmas truck printable templates
Tools
- Scissors
Instructions
- Select colored craft papers for the craft. We’re using red paper for the truck, black, grey and white papers for the wheel and blue paper for the car glass. And of course, green paper for the Christmas tree.
- Trace the provided template patterns on the selected craft papers and cut them out nicely.
- Grab all the wheel circle cutouts and stick the small ones on the medium circles and then the medium circles on the big ones to complete each wheel craft.
- Stick the blue car glass cutout near the top side of the car door cutout.
- Stick the car door pattern on the main car layout by matching the outer edges of the 2 patterns.
- Flip the car to the other side. Grab the rectangle paper cutouts and apply glue along the sides (short ends) and the bottom side of the rectangle.
- Place the glued side on the rectangle part of the car pattern by keeping the intact part towards the top end. We will insert the tree through the top open end of this part.
- Flip the car to the front again.
- Trace and cut out the tree pattern from green colored paper. Insert the tree through the car’s back side’s open end.
Notes
You can easily turn this into a Little Blue Truck Christmas craft by swapping the red paper for blue paper.